Building your own tractor bucket can save you significant money and allow for customization. This guide details the iterative design process, from initial flaws to a robust final product, ensuring you create a durable and effective tool for your tractor. For more tractor attachment ideas, check out this helpful resource.
Initial Design & Its Shortcomings
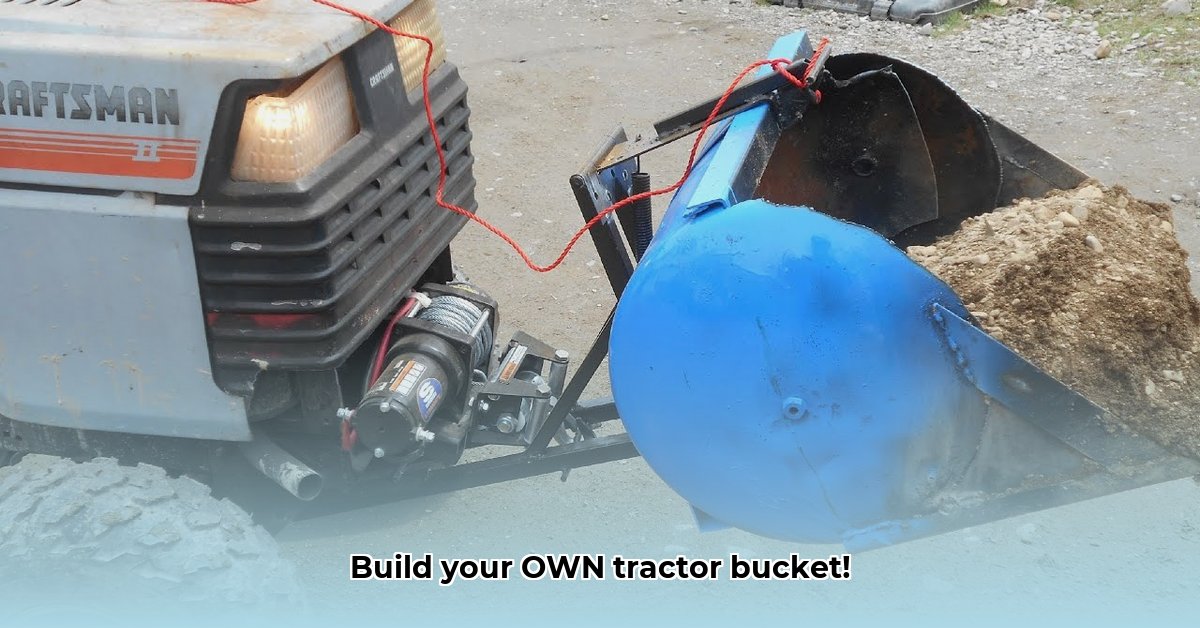
My initial design (Diagram 1) proved overly ambitious. While visually appealing, it lacked the structural strength needed for reliable operation, particularly in the cross-member. The risk assessment (Table 1) highlighted this critical flaw, demonstrating the potential for catastrophic failure. This initial design experience underscores the importance of robust engineering principles.
[Diagram 1: Insert image of initial design here. Clearly indicate weak points, perhaps with arrows and annotations.]
Table 1: Risk Assessment Matrix for Homemade Tractor Bucket
| Component/Aspect | Risk Category | Probability of Occurrence | Severity of Impact | Mitigation Strategies |
|---|---|---|---|---|
| Initial Frame Design | High | Likely | Catastrophic | Complete redesign; use thicker steel; incorporate structural bracing |
| Welding Quality | Medium | Moderate | High | Proper welding techniques; thorough weld inspection; consider professional welding. |
| Material Selection | Low | Unlikely | Moderate | Select appropriately thick and strong steel; verify material certifications. |
| Improper Attachment to Tractor | Medium | Moderate | High | Ensure compatible mounting; reinforce attachment points; use heavy-duty fasteners. |
Have you ever wondered how seemingly minor design choices can impact the overall performance of a project? This initial design failure clearly demonstrates this principle.
Iterative Improvements: Refining the Design
Feedback from experienced DIYers and online forums was invaluable. The revised design (Diagram 2) incorporated several key improvements:
- Thicker Steel: Upgrading to significantly thicker steel plates drastically increased strength and durability. This addresses the core weakness of the initial design.
- Strategic Bracing: Adding bracing at critical stress points enhanced the frame's rigidity, preventing bending and twisting under heavy loads. Think of this as adding support beams to a house.
- Reinforced Mounting Points: Strengthening the welds and incorporating gussets (triangular reinforcement plates) at mounting points prevented premature failure.
[Diagram 2: Insert image of revised design, highlighting the changes made. Use clear labels.]
Did you know that iterative design—repeatedly refining a design based on feedback and testing—is crucial for success? It's not about perfection on the first try, but about continuous improvement.
Materials & Tools: Assembling Your Arsenal
Building your bucket requires the right tools and materials. Here's a detailed list:
- Steel Plates: Thickness depends on your design and tractor's lifting capacity. Source from a reputable supplier.
- Steel Tubing: Select a strong gauge and size.
- Welding Machine: MIG or stick welder suited for the steel thickness.
- Grinder with Cutting Discs: Essential for shaping and cutting.
- Drill with Bits: For creating mounting holes.
- Measuring Tape, Level, Square: Accurate measurements are vital.
- Safety Gear: Gloves, safety glasses, hearing protection are non-negotiable.
Where can you source these materials? Local metal suppliers, hardware stores, and online retailers are good starting points.
Step-by-Step Construction Guide: Building Your Bucket
Let's build! Follow these steps carefully:
- Prepare the Steel: Cut and shape the steel according to your design using the appropriate cutting tools.
- Assemble the Frame: Weld the steel tubing together to create the main frame. Ensure a precise fit before welding.
- Attach the Steel Plates: Weld the bottom and sides to the frame. Reinforce welds, especially at stress points. Consider adding gussets for extra support.
- Reinforce Welds: Inspect and smooth welds using a grinder. Ensure complete penetration of the metal.
- Mount the Bucket: Attach the bucket securely to your tractor's lift arms, ensuring compatibility and stability.
Did you know that proper preparation can save you time and frustration in the long run? Taking your time with the initial steps will lead to a more successful final product.
Welding Techniques: A Critical Skill
Welding is vital. Poor welds lead to failure. If inexperienced, consider seeking assistance from a skilled welder. Prioritize safety precautions.
Safety Precautions: Your Well-being First
Always wear appropriate PPE (Personal Protective Equipment). Take your time; hasty work increases risk.
Testing & Refinement: Trial and Improvement
Test your bucket with increasing loads, monitoring performance. Adjustments might be necessary. This final step is a test of the iterative process.
Conclusion: Your Custom-Built Bucket
Building your own tractor bucket is rewarding. Embrace the iterative process! Share your experience and refine your design based on continued use.